Run and Create TenableIO Scans with Faraday Automation
Creating an Agent
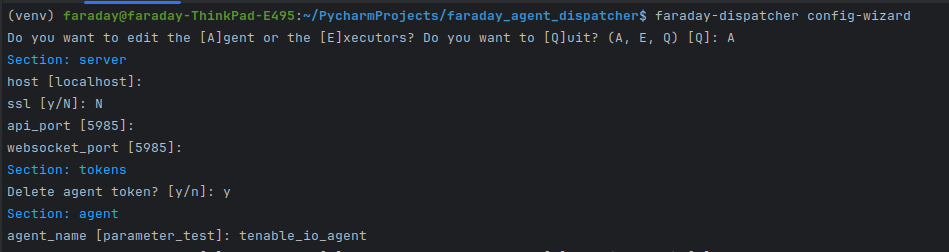
First of all, we need to configure an agent and an executor to be able to use TenableIO scans. Start by running 'faraday-dispatcher config-wizard' on your terminal and configuring your Agent.
For more details about agent configuration, go to Agents documentation.
Creating a TenableIO executor
After creating an Agent, you need to create an executor. To do that:
-Run faraday-dispatcher config-wizard
-Press the letter E when prompted to configure your executor.
-Press the letter A to add a new executor.

You will be prompted to enter a name for your executor. After providing the name, press 'N' to opt out of using a custom executor. Next, input the 'tenableIO' executor number from the list of available executors. This list is displayed in alphabetical order and is paginated. You can navigate between pages using the '+' and '-' keys, as illustrated in the following image:
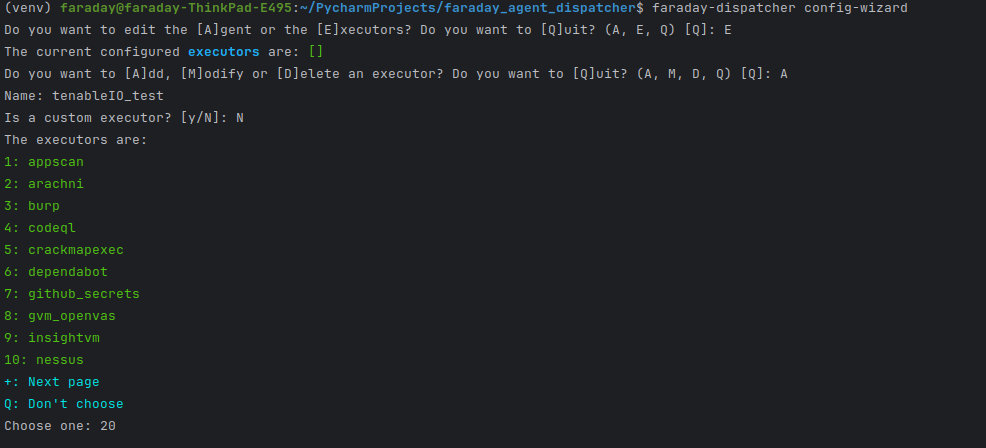 Note: In this case, the TenableIO executor number is 20, but this may change as new executors are added.
After that, you'll be prompted for your tenableIO access key and secret key, which you can generate on your tenableIO account settings under the label 'API KEYS'. You'll be also asked for a pull interval, which is the time the executor waits to ask tenableIO if a scan is completed. The recommended value is 30.
Now you can exit the config-wizard pressing 'Q'.
Run the agent-dispatcher
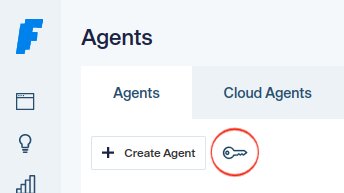
Before running the agent-dispatcher, navigate to your Faraday web application under the automation tab to find the token to run your agent dispatcher. For this, click on the key-shaped button:
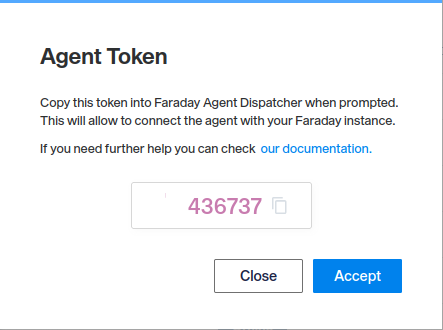
The app will show you a token number for you to copy. Then run in your terminal:
faraday-dispatcher run --token {token_number}.
Then refresh your Faraday automation tab and you'll see your agent in the list. To run your new executor, press the trigger now button and you'll have to select your newly created executor.
To efficiently utilize TenableIO scans with Faraday Automation, follow these four straightforward options:
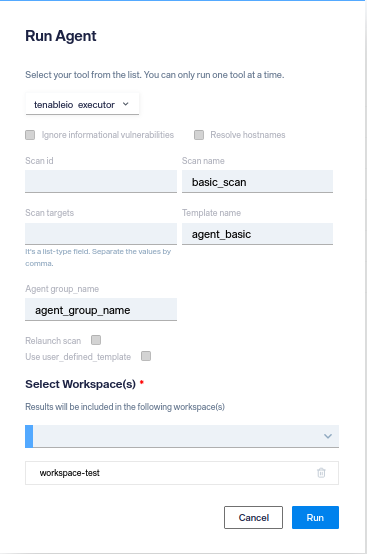
1 - Creating Scans Using TenableIO Templates
Begin by ensuring your agents and executors are configured on the Faraday Automation tab.
Steps:
- Click the 'Trigger Now' button.
- Select your TenableIO executor.
- Fill in the following parameters:
- Scan name: A unique identifier for your scan.
- Template name: Select from TenableIO's predefined templates (common ones include 'agent_basic' and 'agent_advanced').
- Agent group name.
- Select your workspace.
- Click 'Run' to initiate your scan on TenableIO.
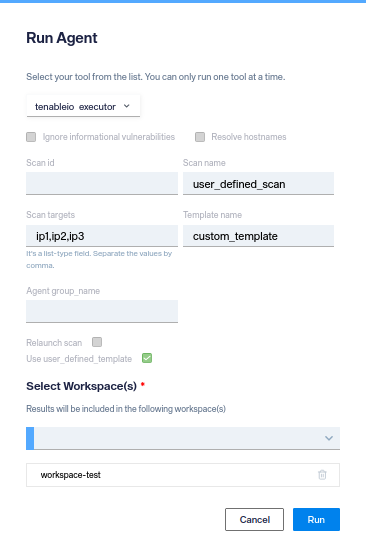
2 - Creating Scans Using User-Defined Templates
Similar to the previous option, ensure your agents and executors are configured.
Steps:
- Click the 'Trigger Now' button.
- Select your TenableIO executor.
- Fill in the following parameters:
- Scan name: A descriptive name for your scan.
- Template name: Specify the user-defined template, which aids in searching for the specific policy ID.
- Scan targets: Input the IP addresses or domains to be scanned.
- Check the box labeled 'Use user_defined_template'.
- Select your workspace.
- Click 'Run' to execute the scan.
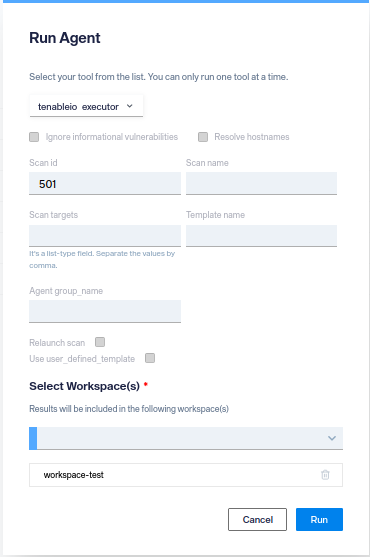
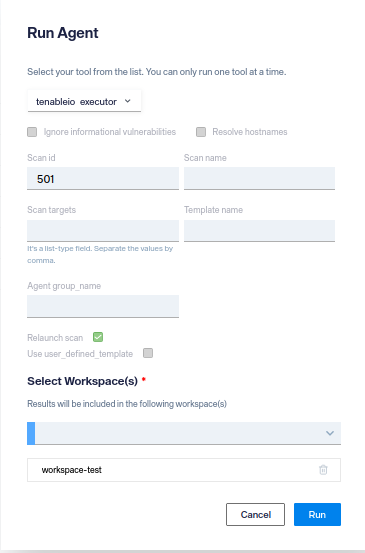
3 - Relaunching an Already Created Scan
If you need to relaunch a scan that's already been created, follow these steps:
Steps:
- Click the 'Trigger Now' button.
- Select your TenableIO executor.
- Provide the following parameters:
- Scan ID: Locate this from the previous scan.
- Check the box labeled 'Relaunch scan'.
- Select your workspace.
- Click 'Run' to relaunch the scan.
4 - Importing Results from a Completed Scan
To import results from a completed scan into Faraday Automation:
Steps:
- Click the 'Trigger Now' button.
- Select your TenableIO executor.
- Fill in the following parameter:
- Scan ID: The identifier for the completed scan.
- Select your workspace.
- Click 'Run' to initiate the import process.