GitLab
This is a feature that allows you to send vulnerabilities from Faraday to GitLab.
Initial Configuration
GitLab's Configuration
Login into GitLab and navigate to Settings > Access Tokens
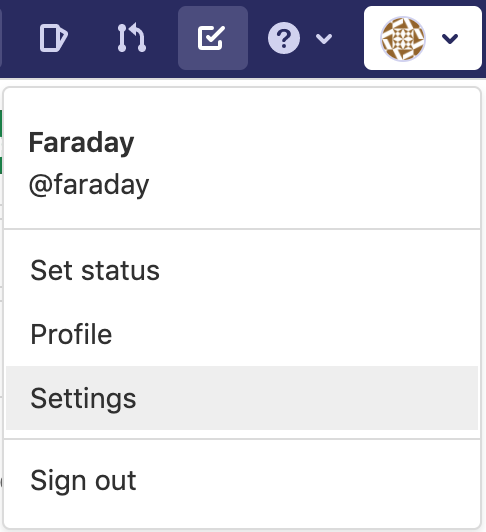
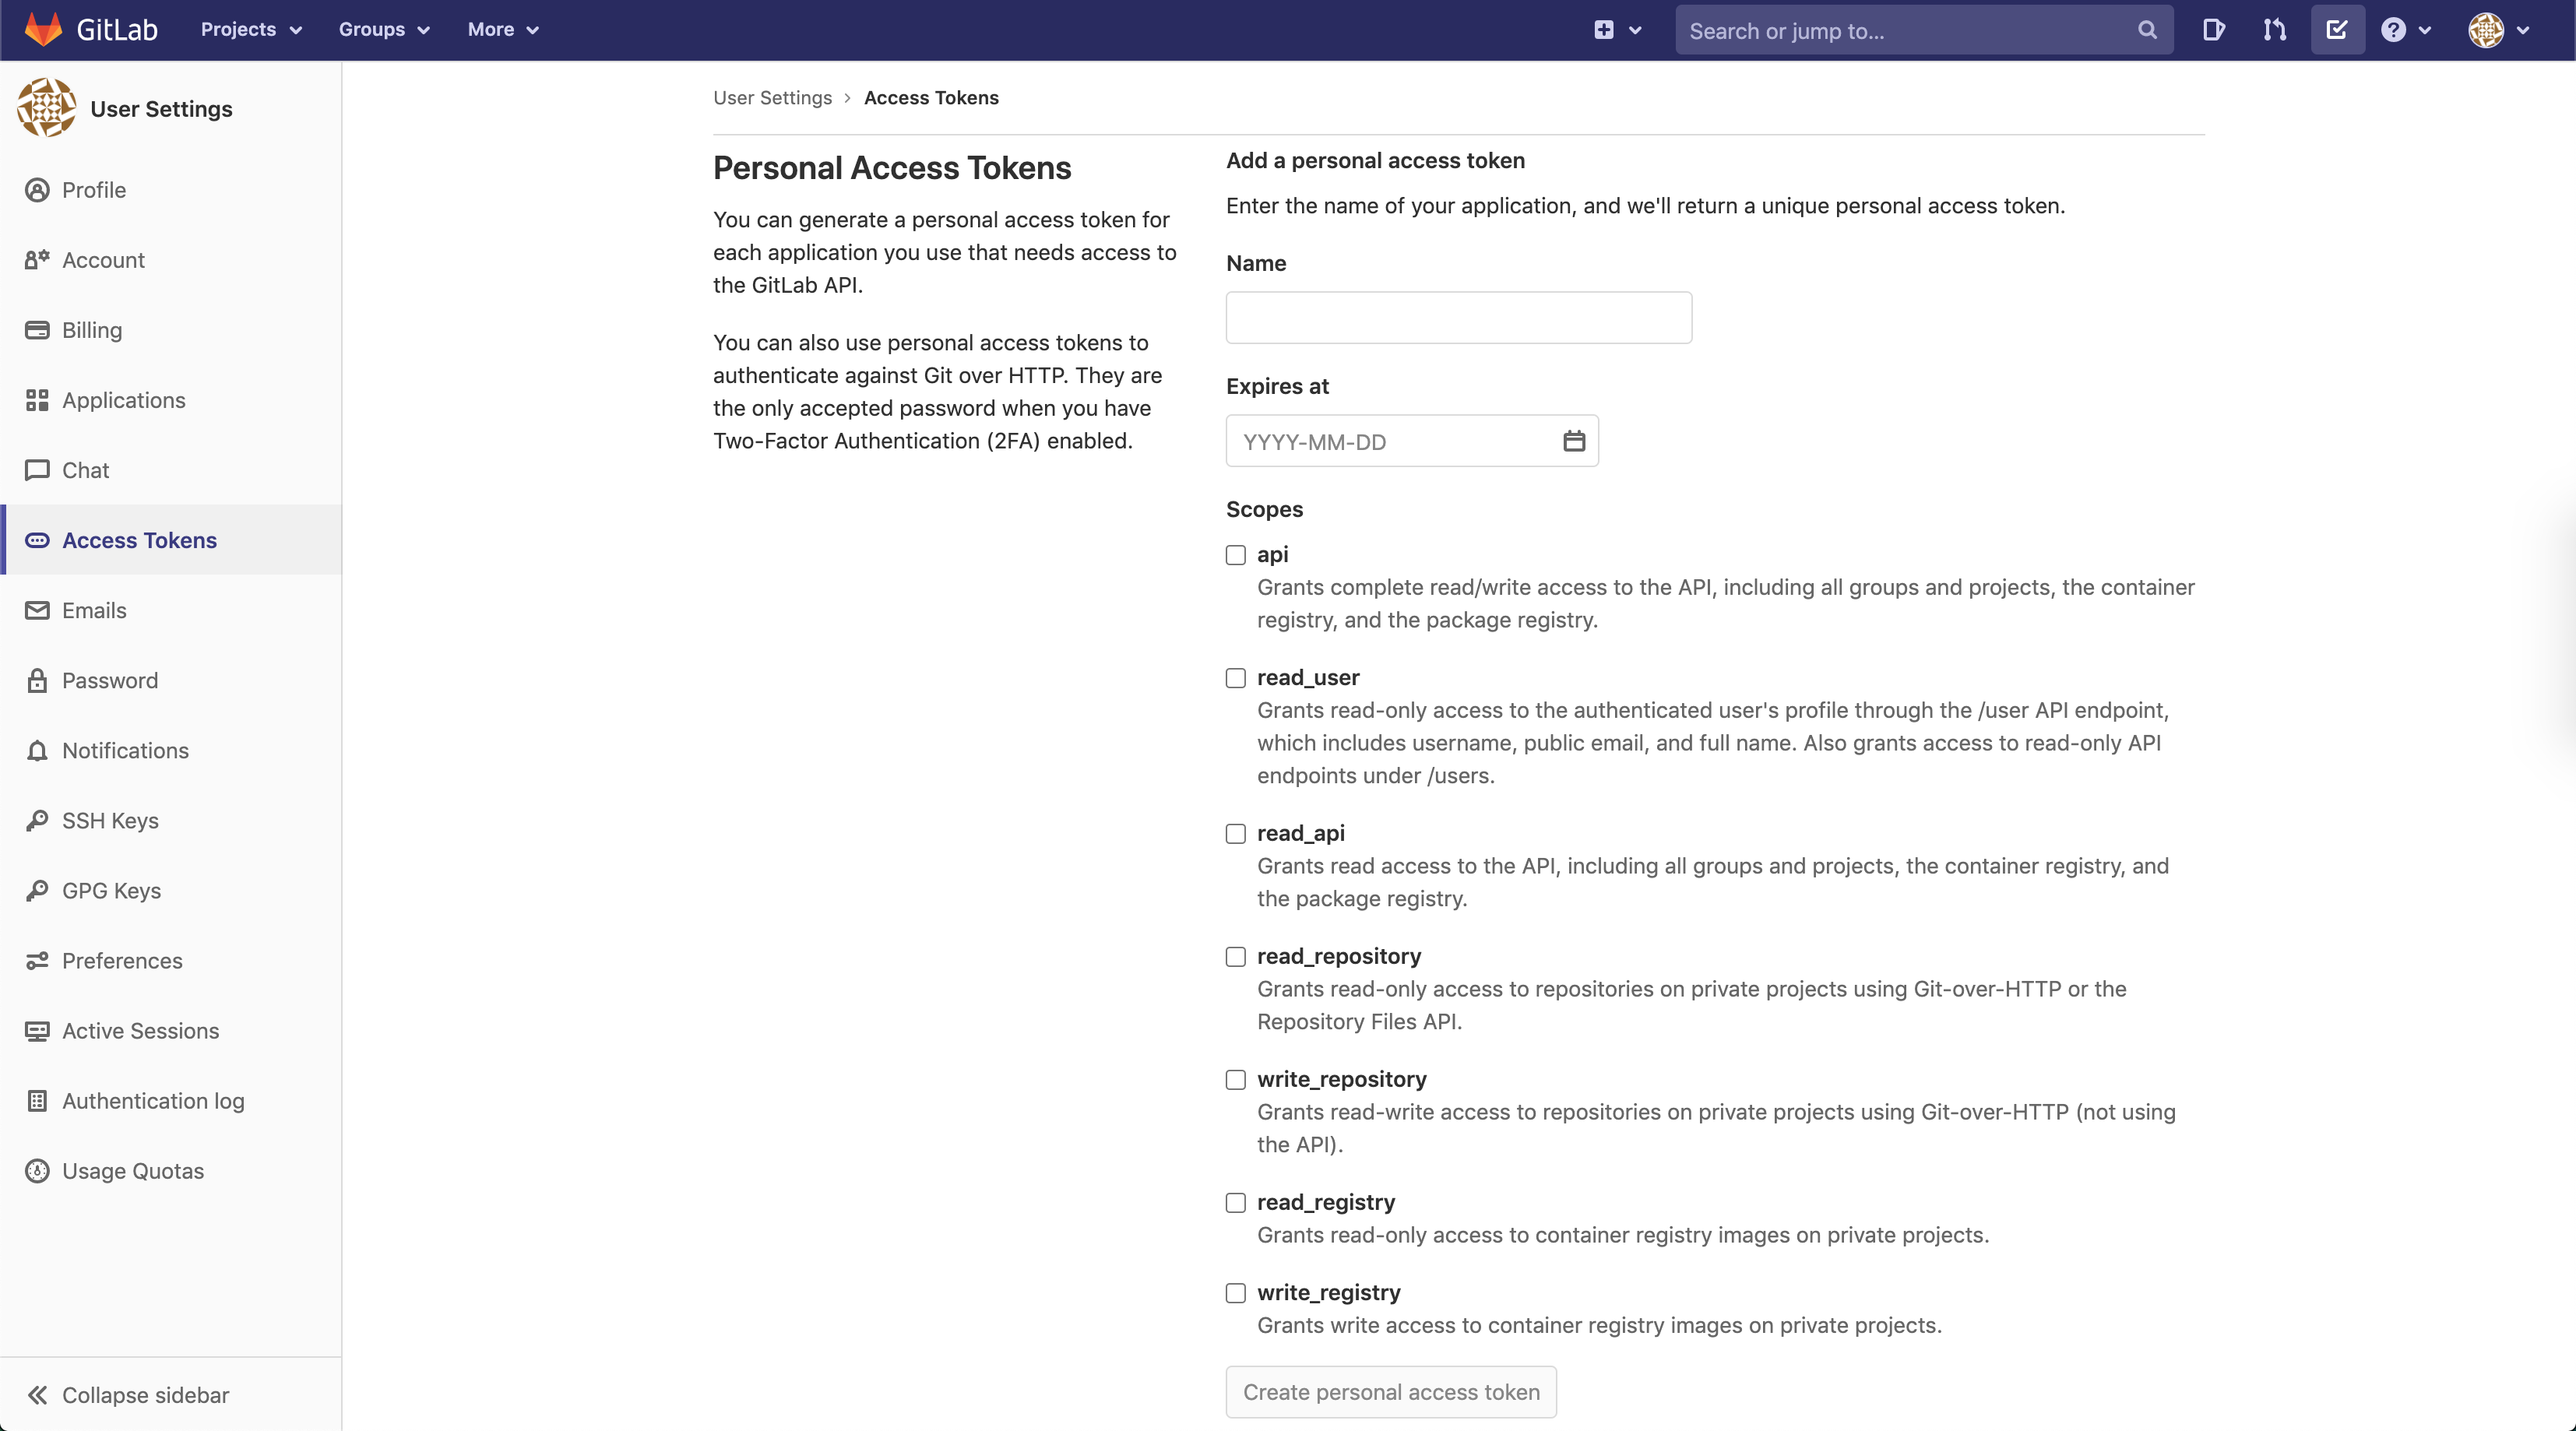
Create a Personal Access Token with the API Scope active:
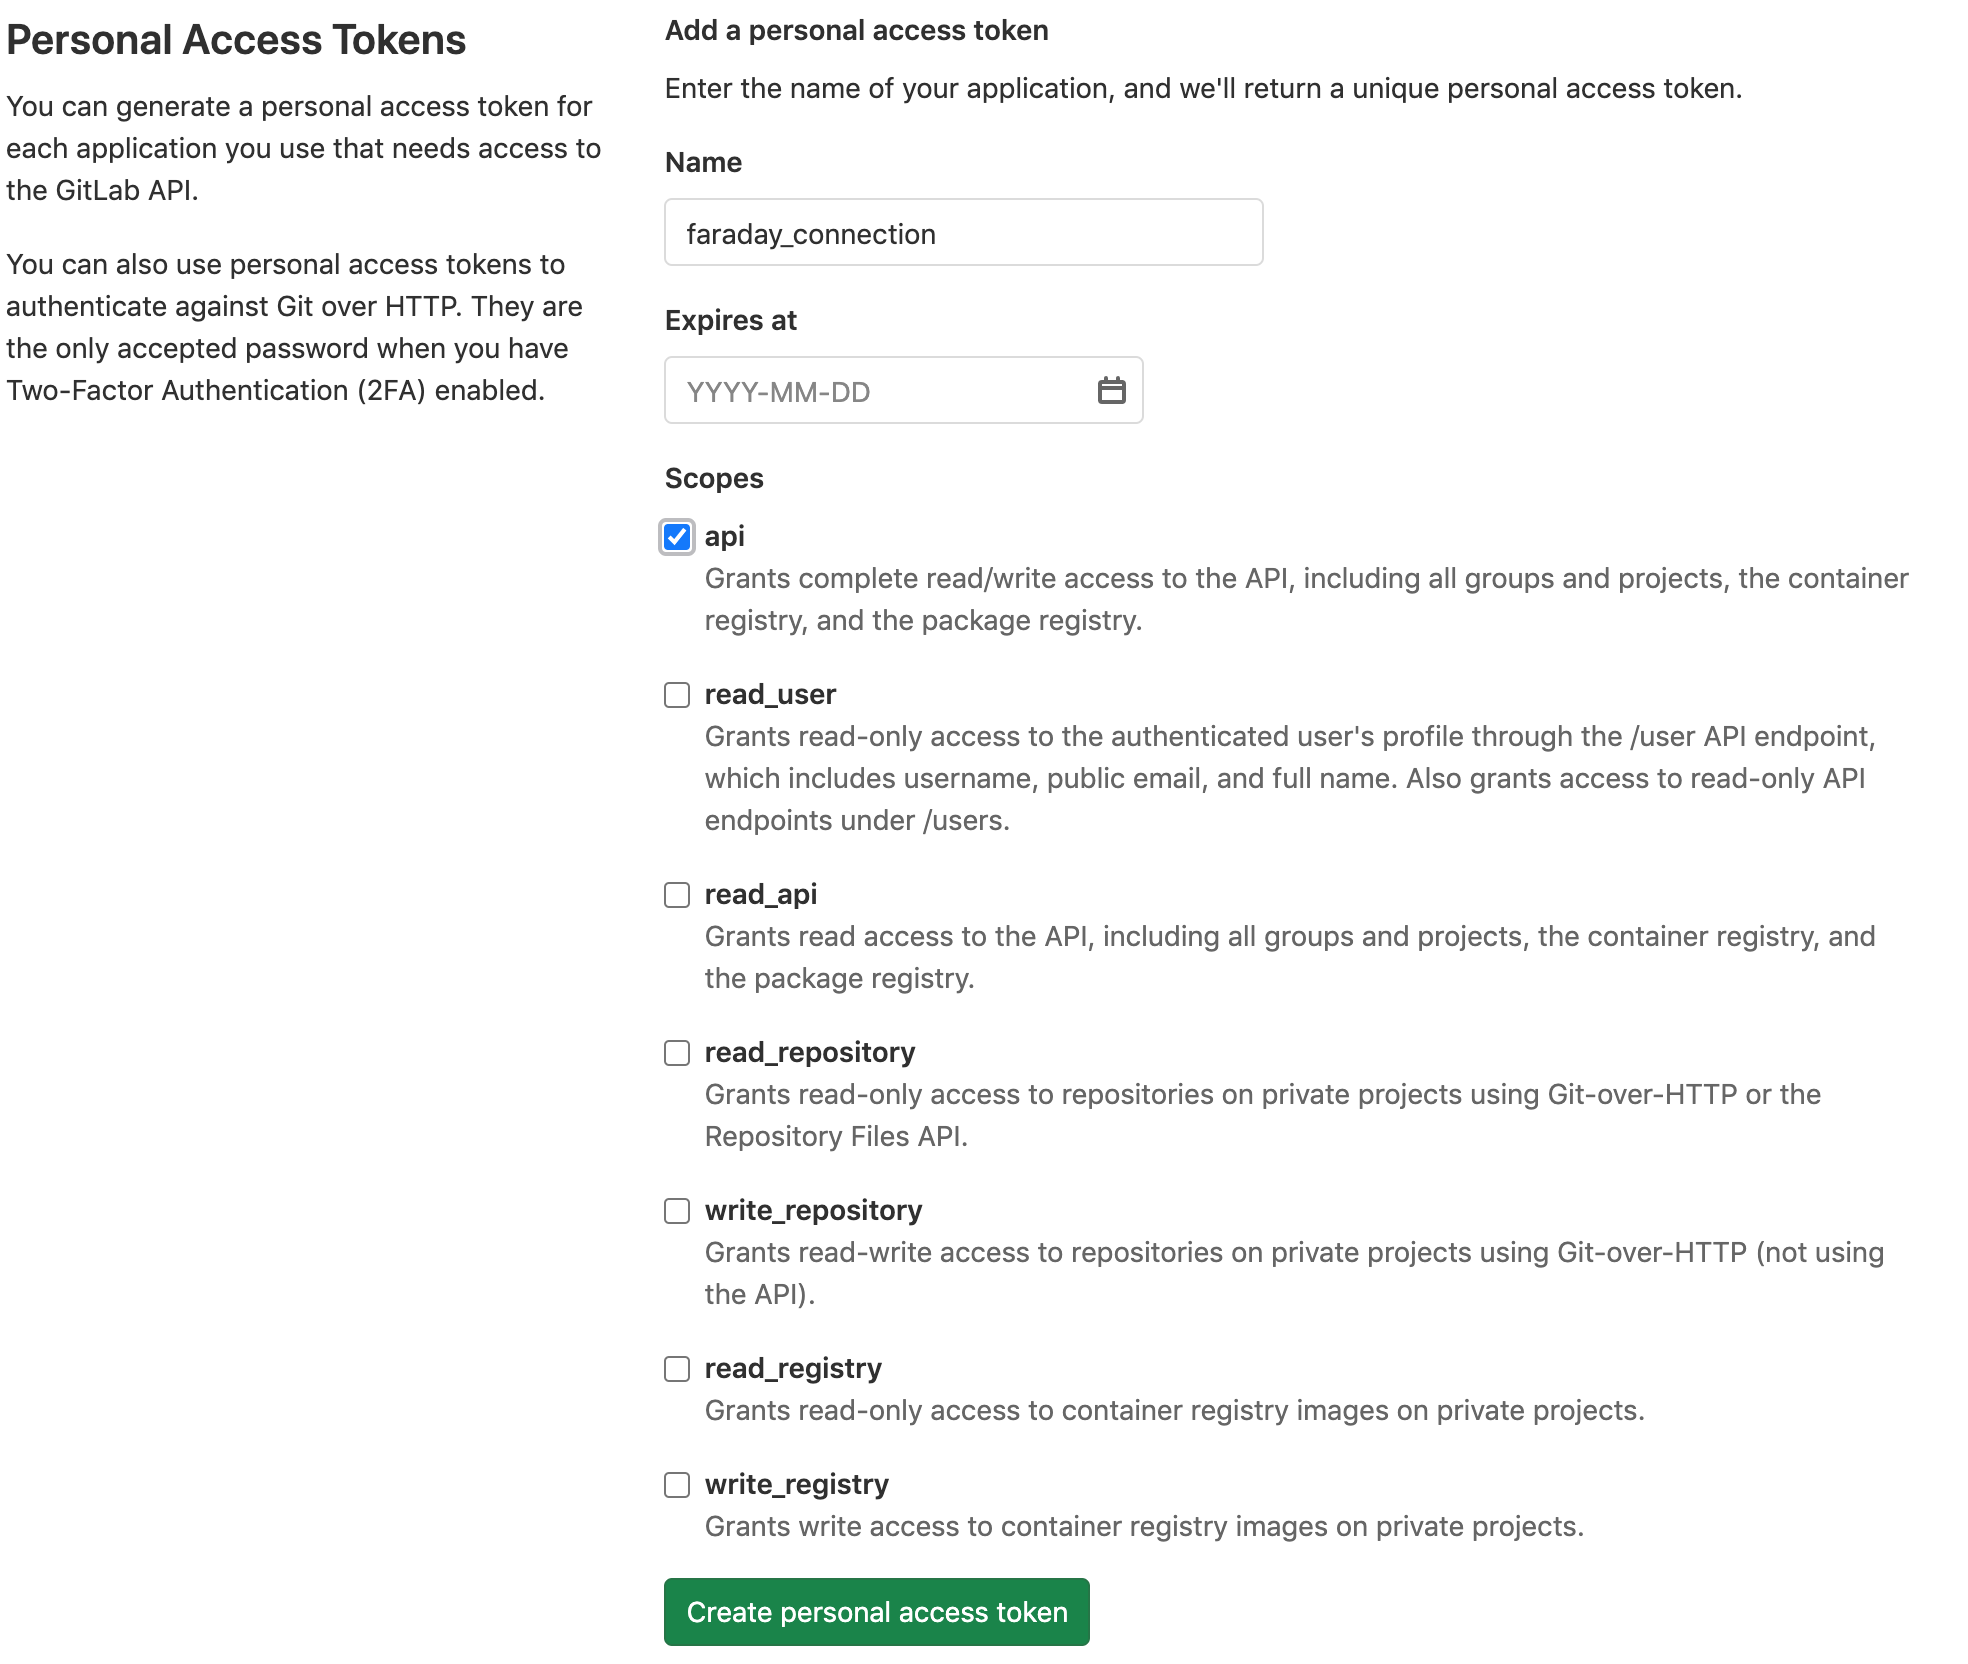

Copy and keep your generated personal access token
Now, select a Project from GitLab to connect with Faraday

Faraday's Configuration
Login into Faraday's Web UI and go to Setting clicking on your username at the top-rigth corner:

Inside Settings, navigate to Ticketing Tools and Select GitLab from the dropdown menu:
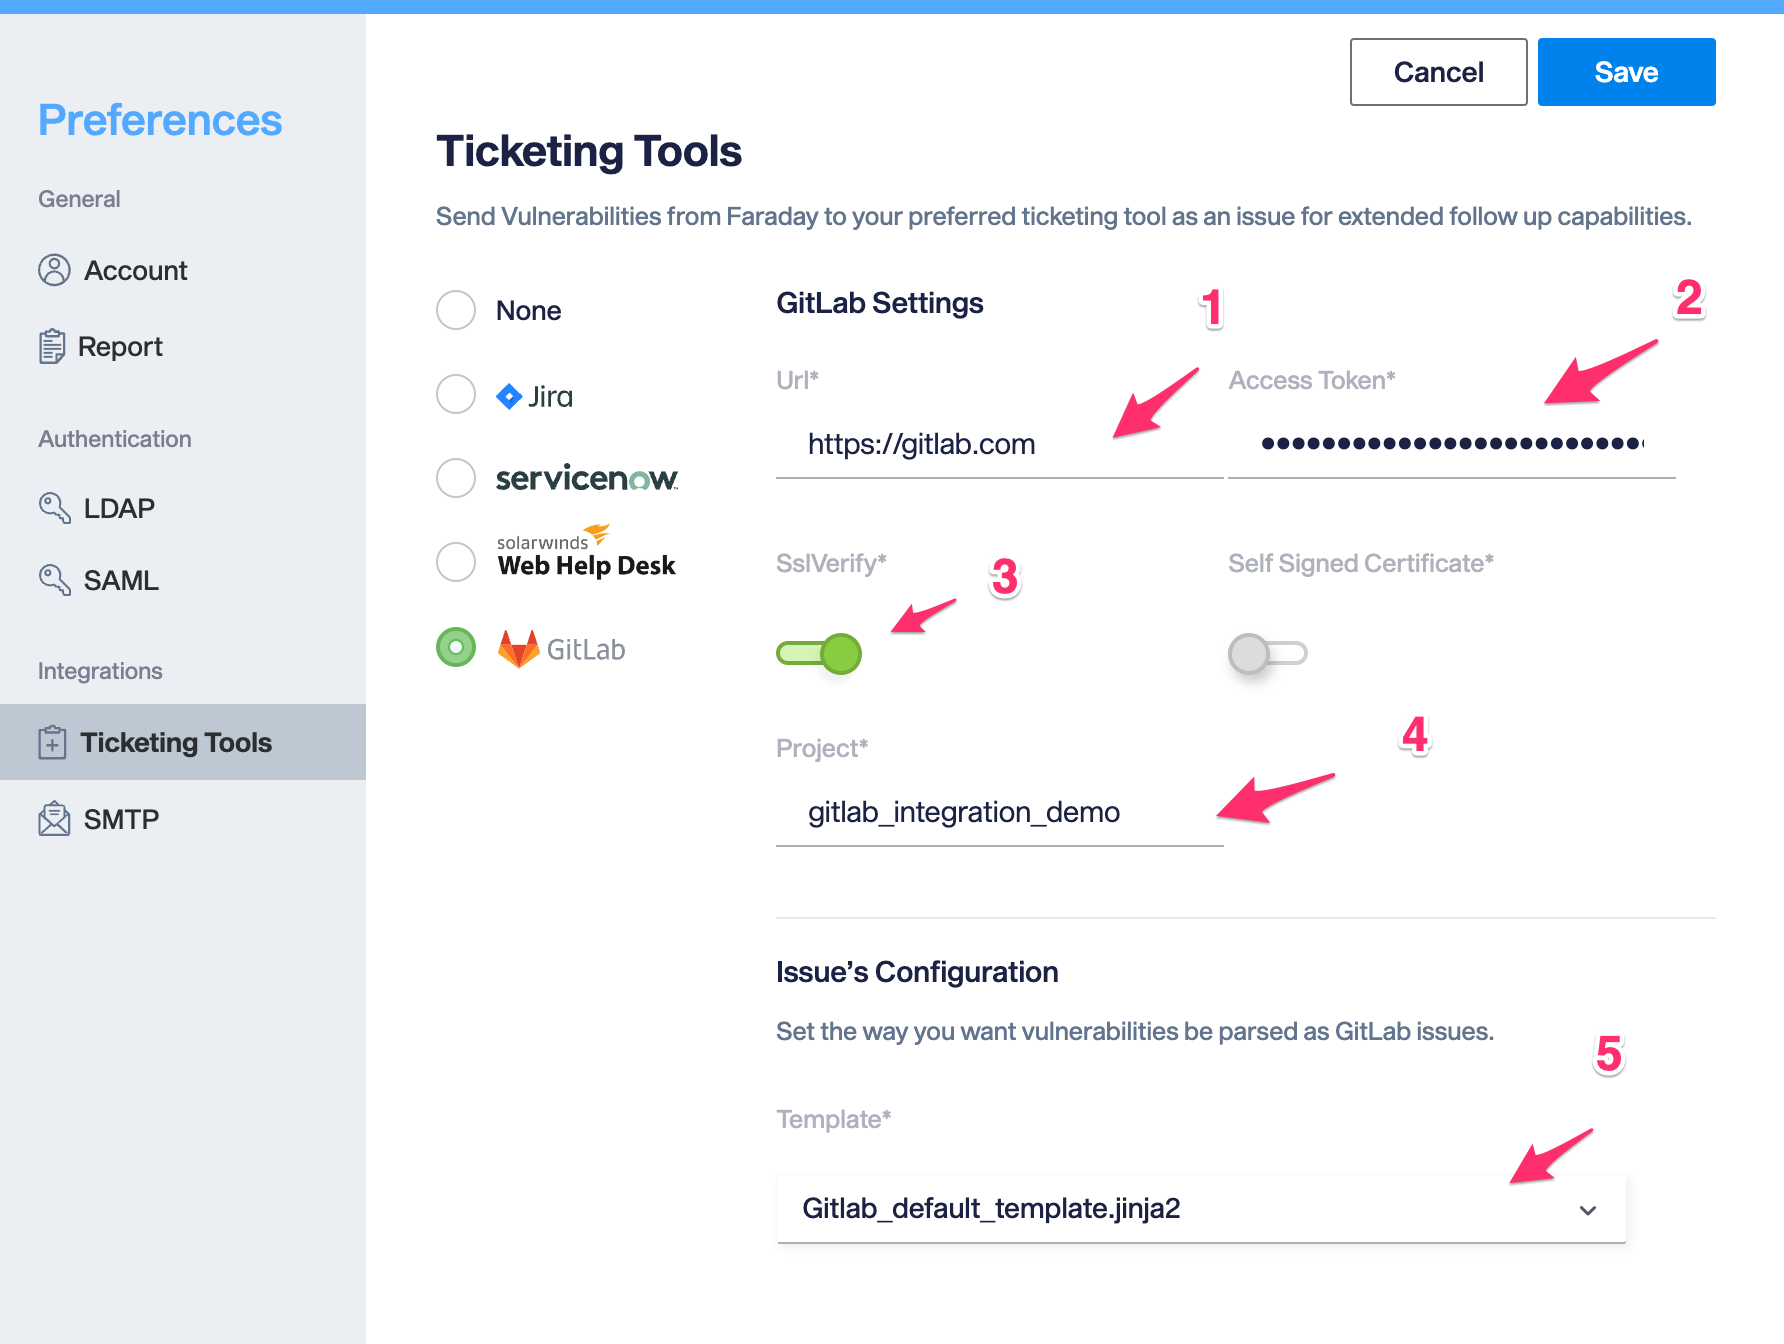
Now, complete those fields with your GitLab Project information.
Access Token (example): 4WRurWXnftGRbqCbJVUG
Project (example): TEST-PROJECT
template : choose a template from the dropdown menu (templates should be inside Faraday's Server at /home/faraday/.faraday/integrations_templates/)
{# This is a Template for Faraday Gitlab Integration #}
{# Pre-Flight Adjustments #}
{% set issuetracker_config = 'gitlab' %}
{% set http_size_config = 4096 %}
{% if 'med' in vuln.severity %}
{% set corrected_severity = 'Medium' %}
{% else %}
{% set corrected_severity = vuln.severity %}
{% endif %}
{# Issue template structure should go under this comment #}
{% if 'VulnerabilityWeb' in vuln.type %}
# [{{ corrected_severity | capitalize}}] {{vuln.name}} - ({{vuln.path}})
{% else %}
# [{{ corrected_severity | capitalize}}] {{vuln.name}}
{% endif %}
## Description
{{ vuln.desc }}
#### This issue has been rated as: `{{ corrected_severity | capitalize }}`
Affected Asset: {{vuln.target}}
{%  if vuln.website %}
Affected URL: {{ vuln.website }}{{ vuln.path }}
{% endif %}
{% if vuln.hostnames %}
#### Hostnames
{% for hostname in vuln.hostnames %}
- {{hostname}}
{% endfor %}
{% endif %}
## Recommendations
{{ vuln.resolution }}
{%for ref in vuln.refs%}
- {{ref}}
{%endfor%}
{%if vuln.easeofresolution%}
#### Estimated ease of resolution
{{ vuln.easeofresolution | capitalize }}
{%endif%}
### Technical Details
{%if vuln.data%}
#### Proof of Concept
{{vuln.data}}
{%endif%}
{%if vuln.request%}
#### Request

{{vuln.request|truncate(http_size_config, False, '...', 0) }}

{%endif%}
{% if vuln.response %}
#### Response

{{ vuln.response|truncate(http_size_config, False, '...', 0) }}

{%endif%}
## Issue [{{ vuln.id }}] {{vuln.name}} [{{vuln.status}}]
{# A vulnerability might be associated with more tha one issuetracker id #}
{% for key, value in vuln.issuetracker_json.items() %}
{% if issuetracker_config in key%}
This issue has already been reported in this platform:
- {{ key | capitalize}}
{% for line in value %}
- Issue: {{line.url}}
{% endfor %}
{% endif %}
source: created by {{vuln.owner or "faraday"}} using {{vuln.tool}} - {{vuln.external_id}} - {{vuln.date}}
{% endfor %}
{# end of file #}
If everything is Ok, click on the green Save button and you should see a pop-up like this:

Send vulnerability to GitLab
Access your Faraday's Web UI and go to Manage > Vulns.
![]()
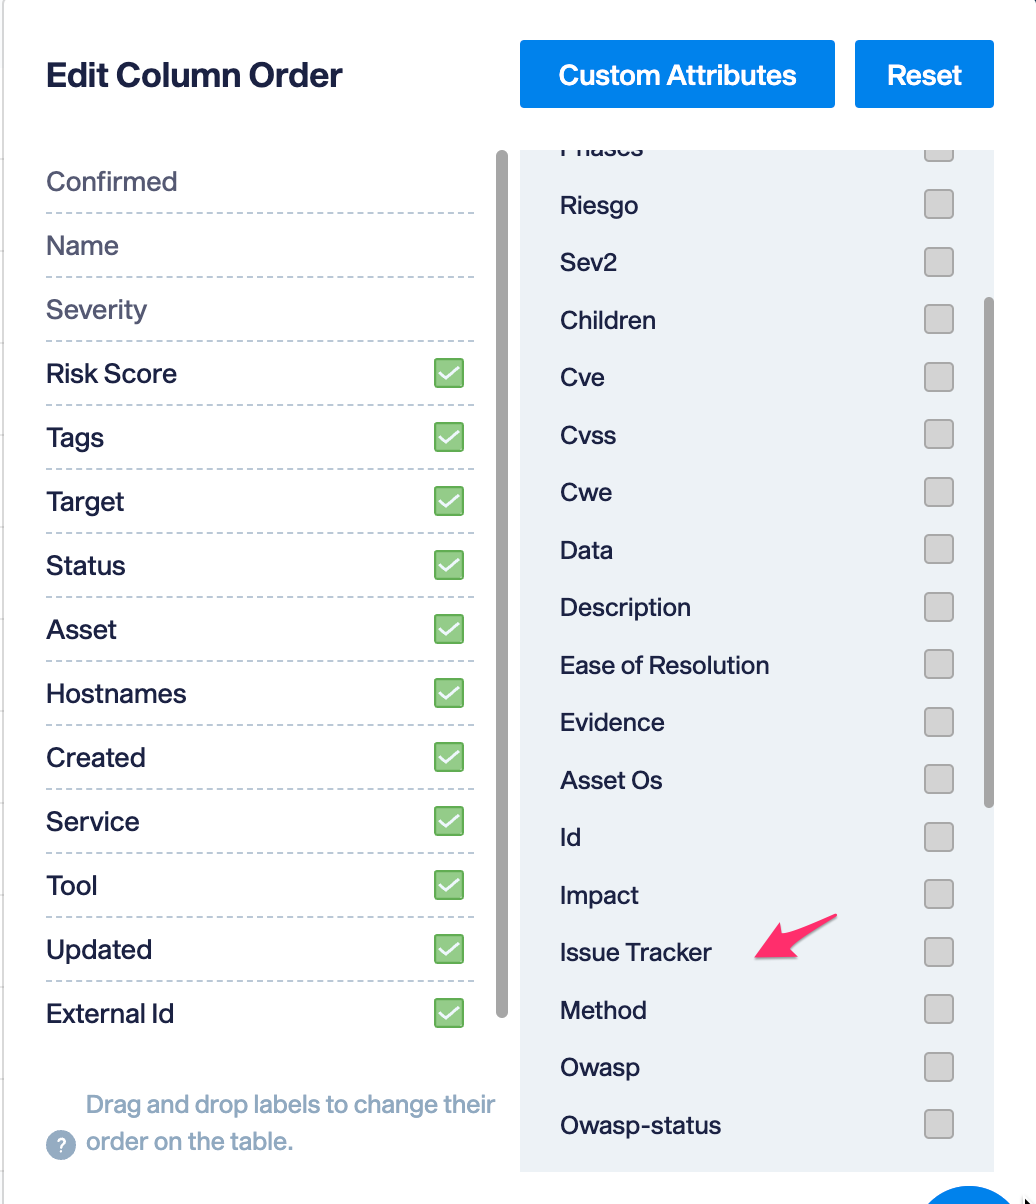
Click on the dropdown menu Add columns and add the issuetracker column.
![]()
Now, select the vulnerability you want to export and click on Tools > Gitlab

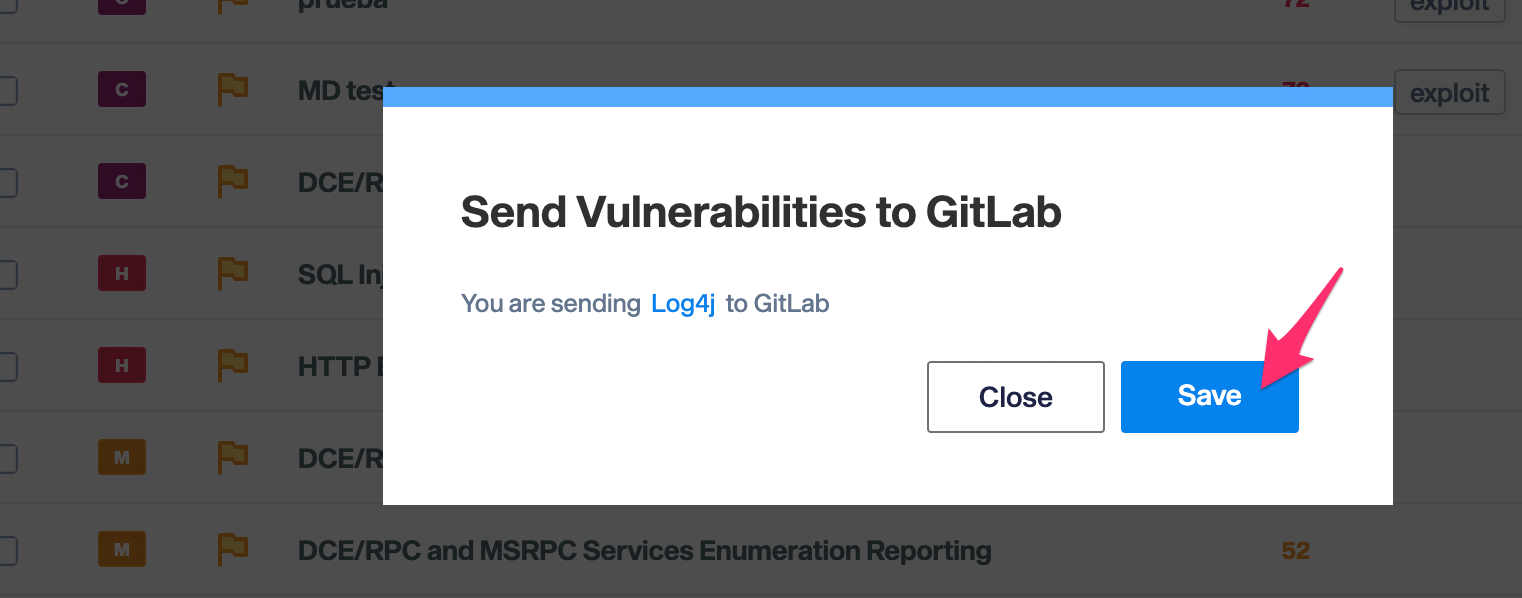
Click Ok.
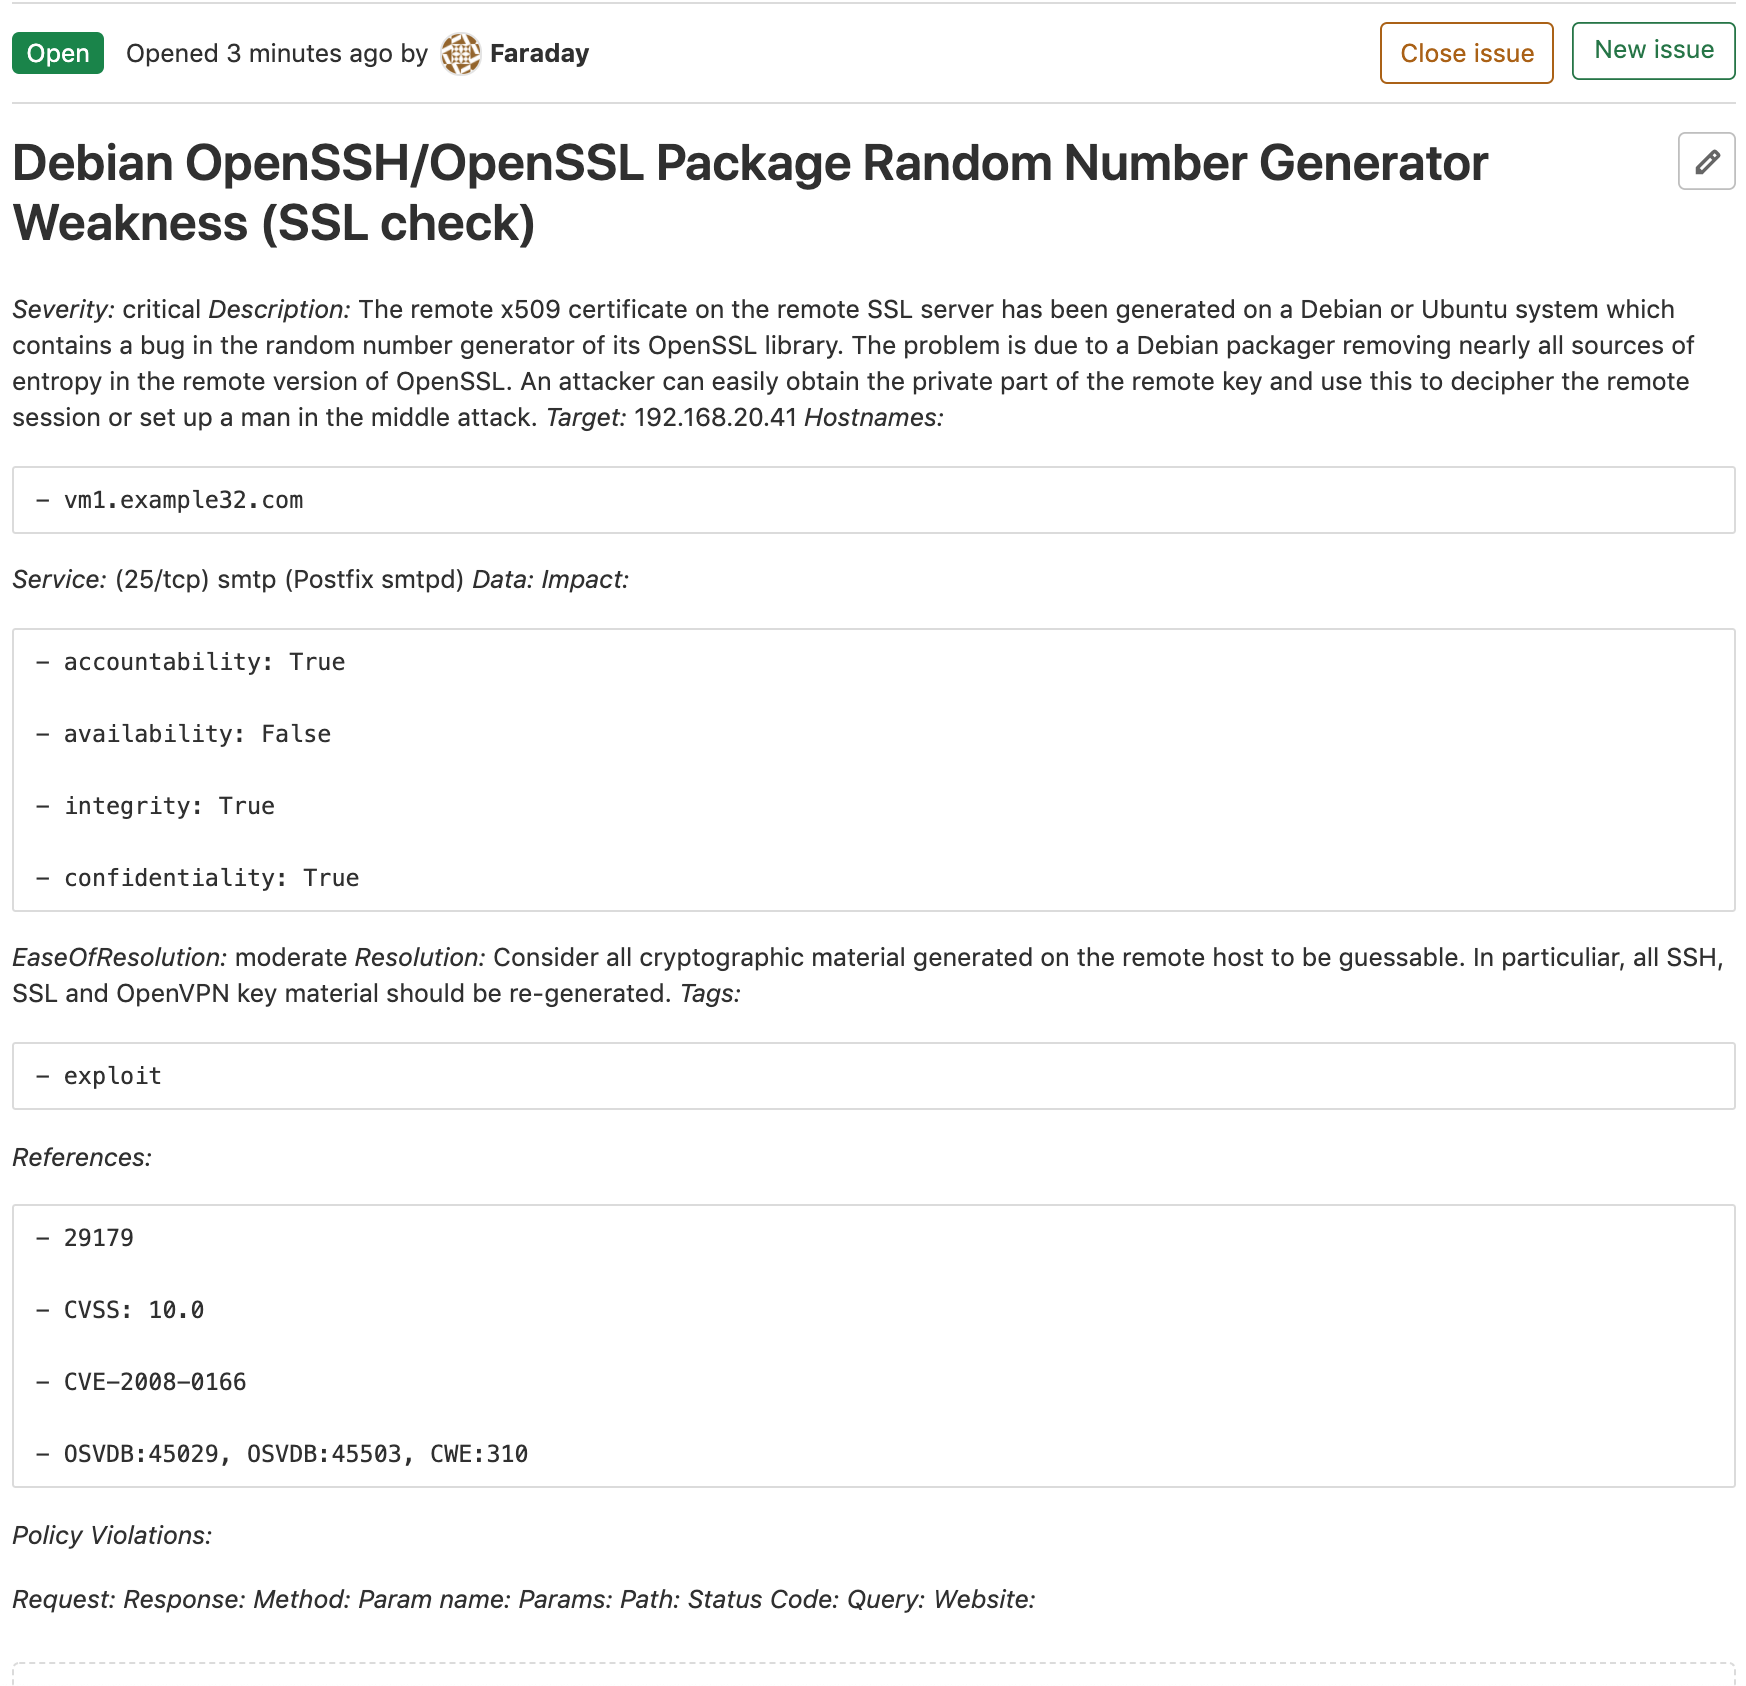
You should see the word Gitlab appearing on the issuetracker column at your vuln, you can click on it to see the issue that has been created on gitlab!
Using GitLab Webhooks
You can use GitLab Webhooks in order to keep your vulnerabilities status updated.
The Open and Re-Opened statuses in Faraday correspond to the Open status in GitLab. Conversely, the Closed and Risk-Accepted statuses in Faraday correspond to the Closed status in GitLab.
Getting your User Token
First, you will need a User Token to authorize your GitLab Webhook to make requests to the Faraday API.
Navigate to Faraday Settings and select Access Tokens from the side menu.
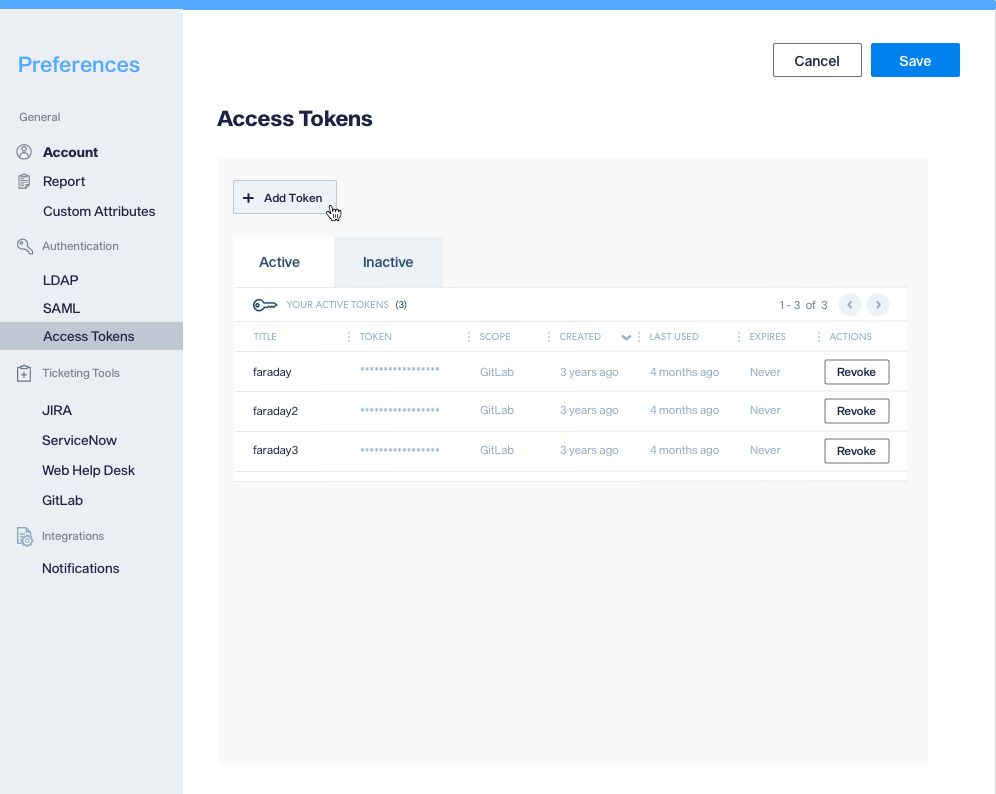
Choose GitLab as the scope, optionally provide an alias, and set the token duration if you want it to expire.
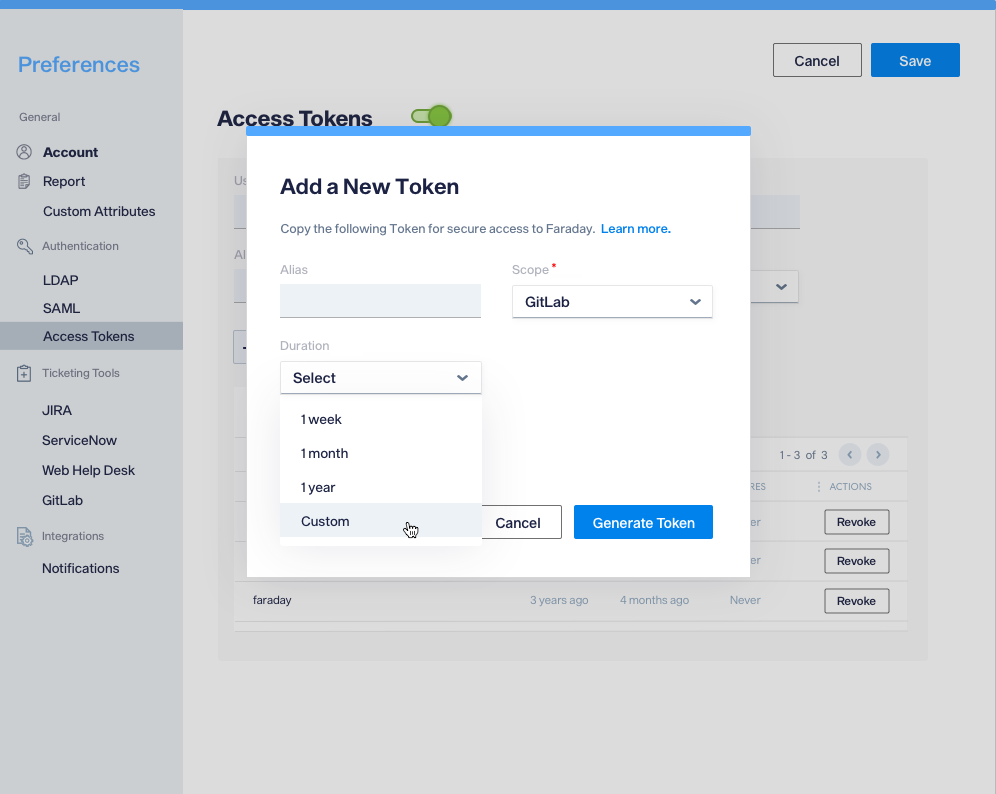
Please remember that your token will be displayed only once. If you lose it, you will need to generate a new one.
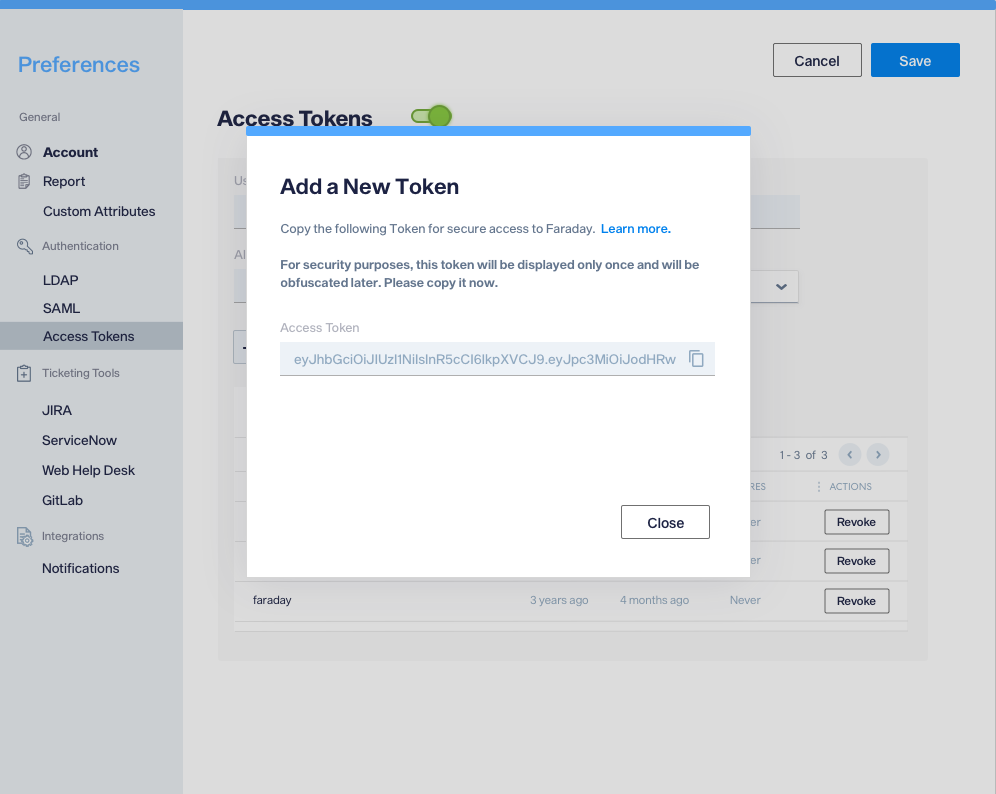
Creating your GitLab Webhook
In order to create your Webhook, follow these steps:
1. Go to your GitLab project.
2. In the Settings menu, select Webhooks.
3. Provide your Faraday instance url with the GitLab integration API path (e.g., https://example.apps.faradaysec.com/_api/v3/integrations/gitlab/issues/update).

- Copy your generated User Token and paste it under
Secret token. - From the
Triggerlist you should selectIssues eventsandConfidential issues events.
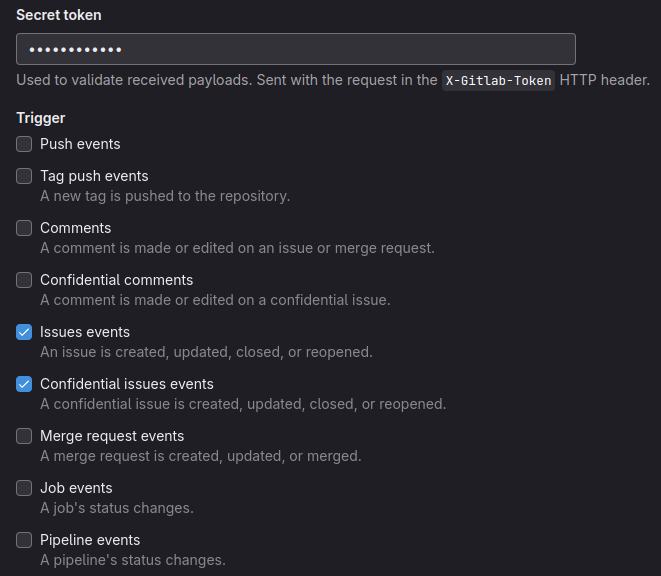
- Save your changes.
- Test your new Webhook by opening the
Testdropdown box and selectingIssues events.
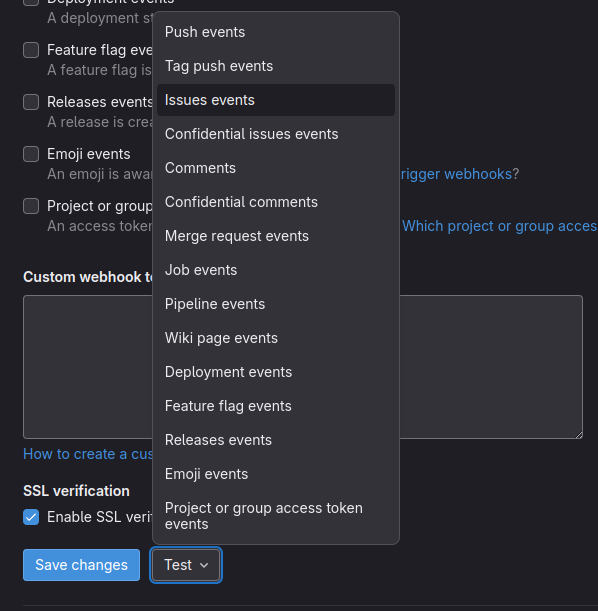
This configuration will update automatically the status of your Faraday vulnerabilities if you close or re-open a GitLab issue that has been sent vía Faraday GitLab integration tool. Similarly, if you close or re-open one of these Faraday vulnerabilities, the status of your GitLab issue will be updated.