Custom Attributes
Custom Attributes allow you to extend the vulnerability's model with more fields. From the Web UI, a Custom Attribute can be one of seven types: String, Integer, Float, List, Choice, Markdown or Date.
If you want to learn more about the usage of Custom Attributes through Faraday's API, follow this link.
How to create Custom Attributes
From Web UI
You can create/edit/delete a Custom Attribute from two places in the app:
- Clicking on the
Custom Attributesbutton from theColumn Ordericon, in the vulnerabilities table. - From the User's menu, going to Preferences > Instance Settings > Custom Attributes (see Preferences).
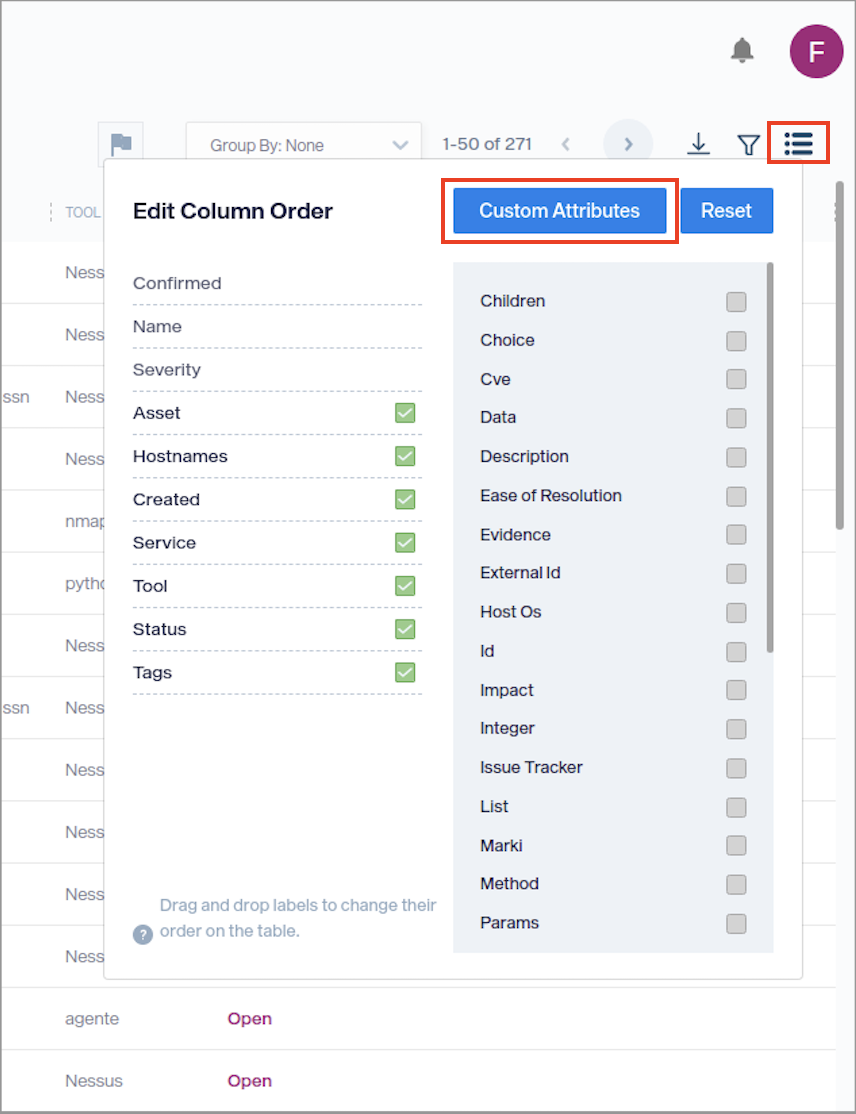
Let's create one as an example:
-
You must fill the following fields in order to create a Custom Attribute:
- name: the display name that you will see on the vulnerability form.
- Type: data type of the field. Choose one of String, Integer, Float, List, Choice, Markdown or Date.
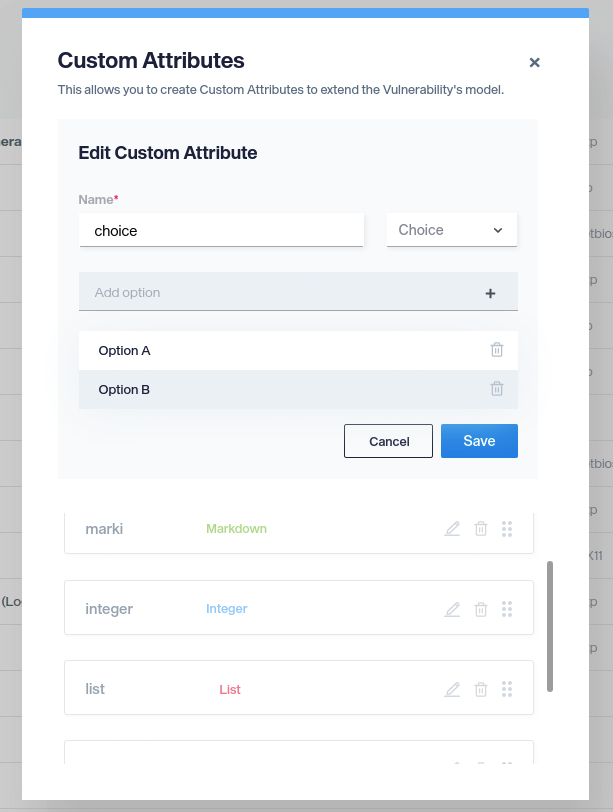
-
After successfully creating the Custom Attribute, you will see it on the vulnerability form:
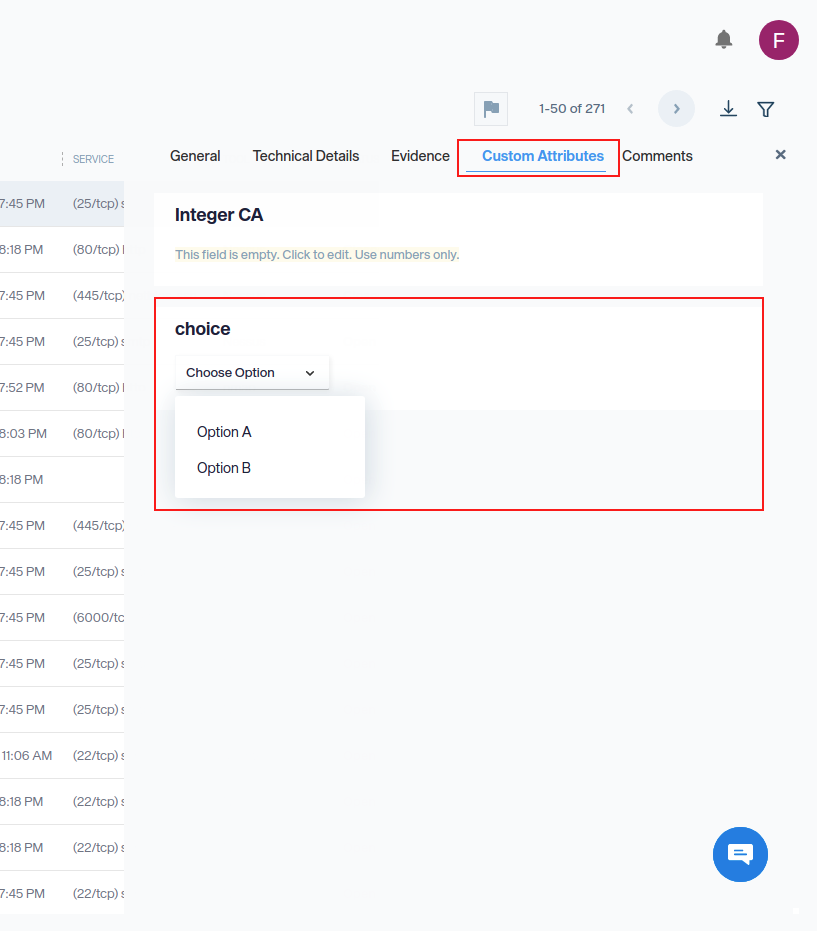
From Terminal (local install only)
Step 1: Add custom attribute
$ faraday-manage add-custom-field
Step 2: After the command execution, you will be prompted by a wizard where you must input the following information:
- Field name: the name of the field.
- Display name: the display name that you will see on the vulnerability form.
- Type: data type of the field. The terminal wizard supports a subset of the Web UI types: int, float, str and list (choice, markdown and date are only available from the Web UI).
- Order: the order shown on the vulnerability form.
The following example will add the CVSS field to the vulnerability model:
This wizard will guide you to ADD custom field to the vulnerability model.
Field name: cvss
Display name: CVSS
Field type (int, float, str, list): str
Field order index: 0
New CustomField will be added to vulnerability -> Order 0 (cvss, CVSS, str) <- confirm to continue (yes/no): yes